
I have been exploring serverless functions for awhile. Then, I found out about Netlify functions which is very easy to implement for beginners like me. I decided to build a simple form submission for my audience to say hi from my personal webpage. I would like to share how I implemented Netlify Function and using Airtable as database.
Installing netlify-cli
First, let install netlify-cli on our machine. If you already have netlify-cli, you can skip this step and go to next section. You can install globally via npm by
$ npm i -g netlify-cliWe can use the following commands to verify that we have installed successfully:
$ netlify --help # Or "ntl --help" for shorter syntax
Netlify command line tool

VERSION
  netlify-cli/3.4.2 win32-x64 node-v12.18.2

USAGE
  $ netlify [COMMAND]

COMMANDS
  addons     (Beta) Manage Netlify Add-ons
  api        Run any Netlify API method
  build      (Beta) Build on your local machine
  deploy     Create a new deploy from the contents of a folder
  dev        Local dev server
  env        (Beta) Control environment variables for the current site
  functions  Manage netlify functions
  help       display help for netlify
  init       Configure continuous deployment for a new or existing site
  link       Link a local repo or project folder to an existing site on Netlify
  login      Login to your Netlify account
  open       Open settings for the site linked to the current folder
  plugins    list installed plugins
  sites      Handle various site operations
  status     Print status information
  switch     Switch your active Netlify account
  unlink     Unlink a local folder from a Netlify site
  watch      Watch for site deploy to finish
Add netlify.toml file
Second, we need to add netlify.toml file under the root of the application project. This is going to tell Netlify where our serverless functions are.
# Inside netlify.toml
[build]
  functions = "functions"
Create sayhi serverless functions
Next, create a new serverless function locally by using hello-world function template:
$ ntl functions:create sayhi
? Pick a template
  ----[JS]----
> [hello-world] Basic function that shows async/await usage, and response formatting
  [apollo-graphql] GraphQL function using Apollo-Server-Lambda!
  [apollo-graphql-rest] GraphQL function to wrap REST API using apollo-server-lambda and apollo-datasource-rest!
  [auth-fetch] Use `node-fetch` library and Netlify Identity to access APIs
  [create-user] Programmatically create a Netlify Identity user by invoking a function
  [fauna-crud] CRUD function using Fauna DB
(Move up and down to reveal more choices)
You will see newly created serverless functions under functions/sayhi/sayhi.js
// Docs on event and context https://www.netlify.com/docs/functions/#the-handler-method
const handler = async (event) => {
  try {
    const subject = event.queryStringParameters.name || 'World'
    return {
      statusCode: 200,
      body: JSON.stringify({ message: `Hello ${subject}` }),
      // // more keys you can return:
      // headers: { "headerName": "headerValue", ... },
      // isBase64Encoded: true,
    }
  } catch (error) {
    return { statusCode: 500, body: error.toString() }
  }
}

module.exports = { handler }
Run the serverless function locally
We can run our sayhi serverless function on our localhost by using:
$ ntl dev
◈ Netlify Dev ◈
◈ Functions server is listening on 64128
◈ Starting Netlify Dev with gatsby
◈ .. snip ..
It will take a few seconds to spin up the local server. Once it is done, you can navigate to http://localhost:8888/.netlify/functions/sayhi
{"message":"Hello World"}Then, you will see the response in your browser.
Optional: Add redirect for severless function
This is optional. I want to change the route name into /api/sayhi instead of /.netlify/functions/sayhi. To do that, we have to add redirection inside netlify.toml file:
[build]
  functions = "functions"

[[redirects]]
  from = "/api/*"
  to = "/.netlify/functions/:splat"
  status = 200
After this, we need to stop Netlify development server and start ntl dev again. Now we have scaffolded our sayhi serverless function. Next, we are going to configure and setup Airtable.
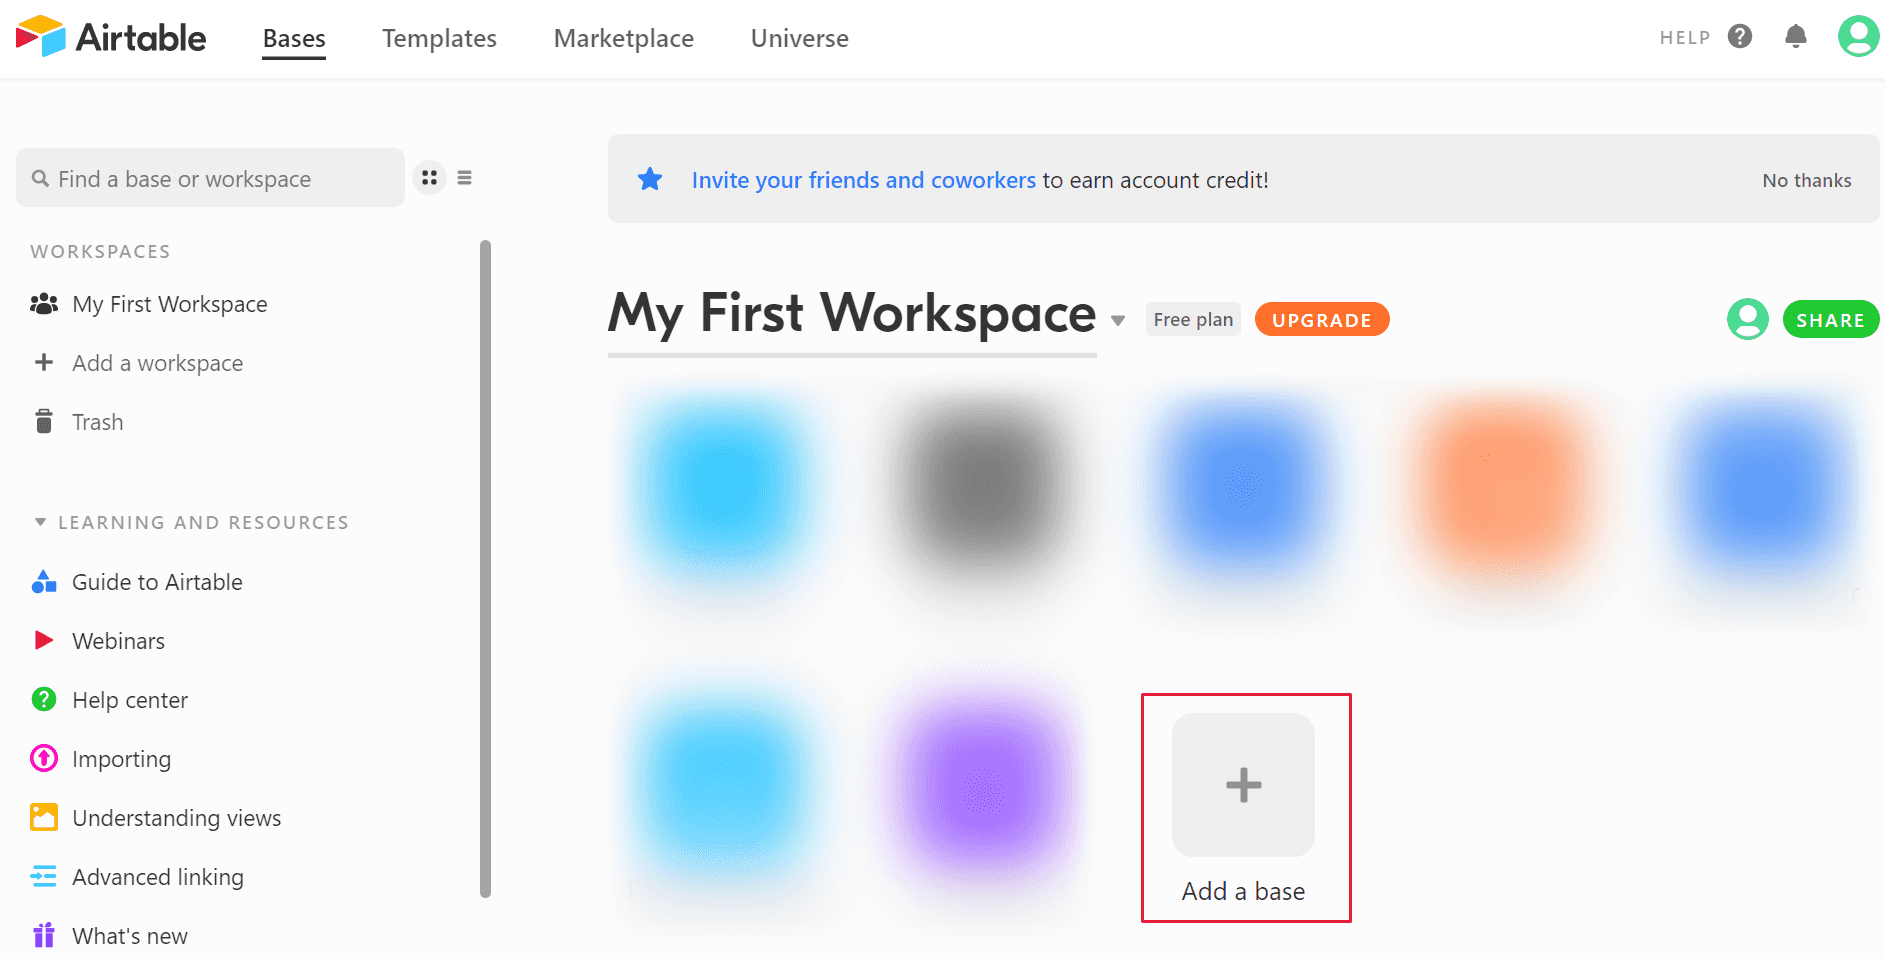
Creating new base in Airtable
If you do not have any Airtable account yet, you can create a free account at airtable.com. If you already have it, let's create new base for our database from the scratch. I will name it sayhi

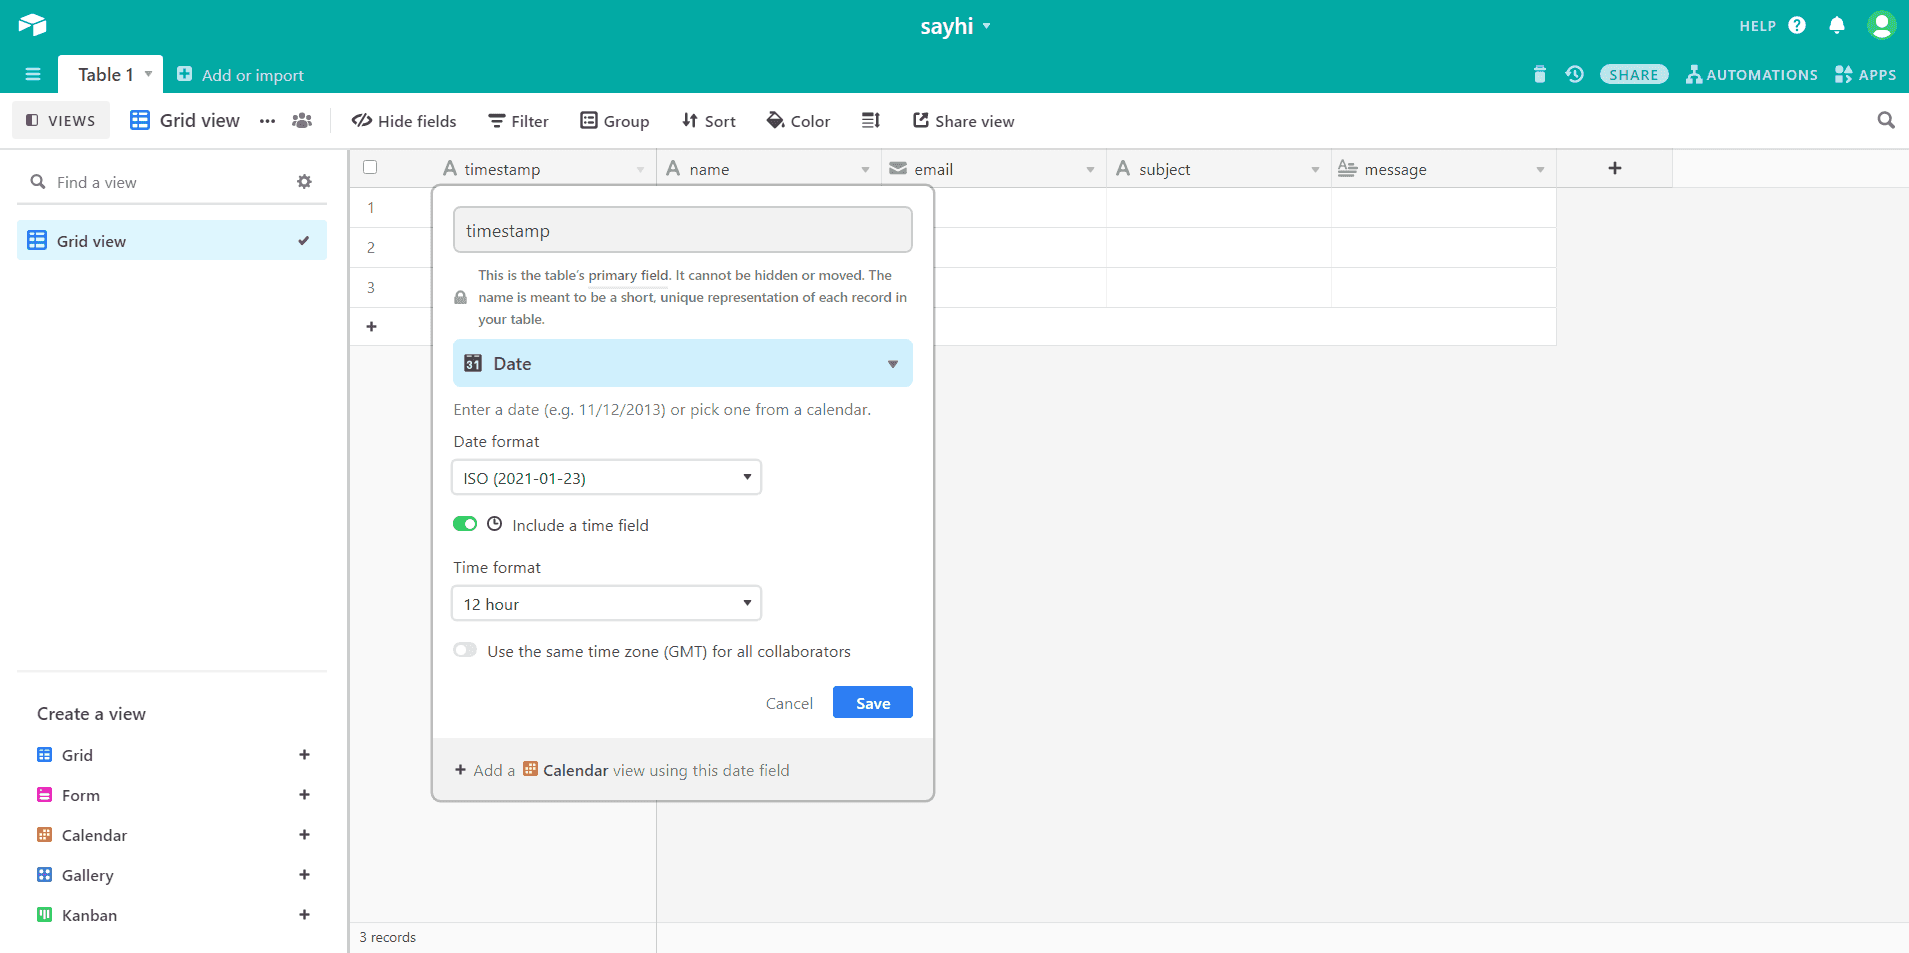
You will see the standard columns (Name, Notes and etc.) in our newly created base. Since we are building something like contact form for our sayhi function, we will delete the default column and create:
- Primary field: timestamp (as Date format)
- name (as Single Line Text)
- email (as Email format)
- subject (as Single Line Text)
- message (as Long Text)
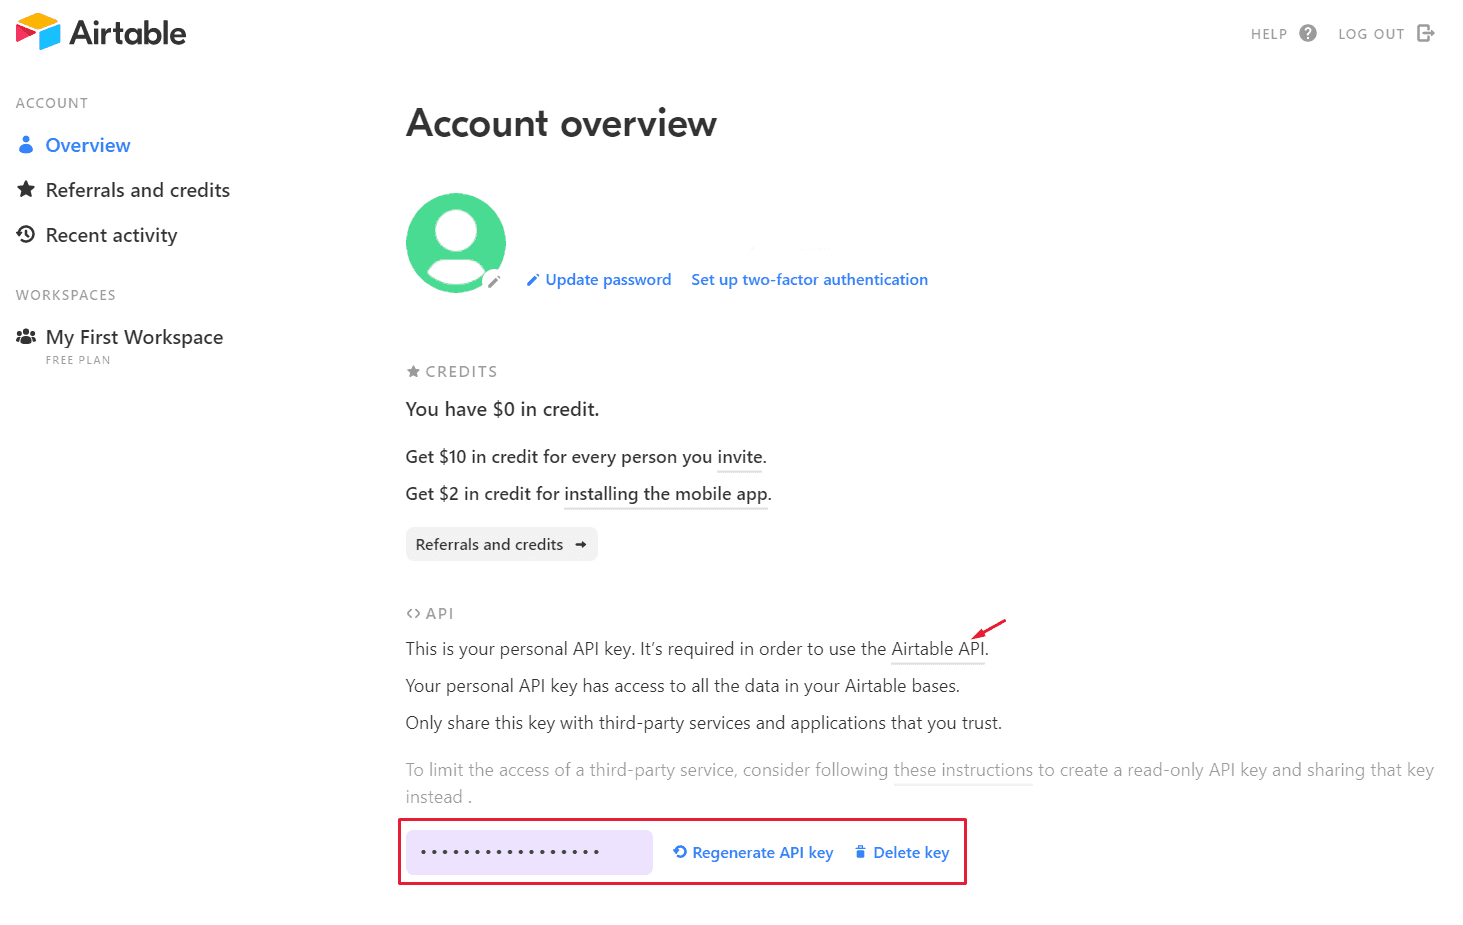
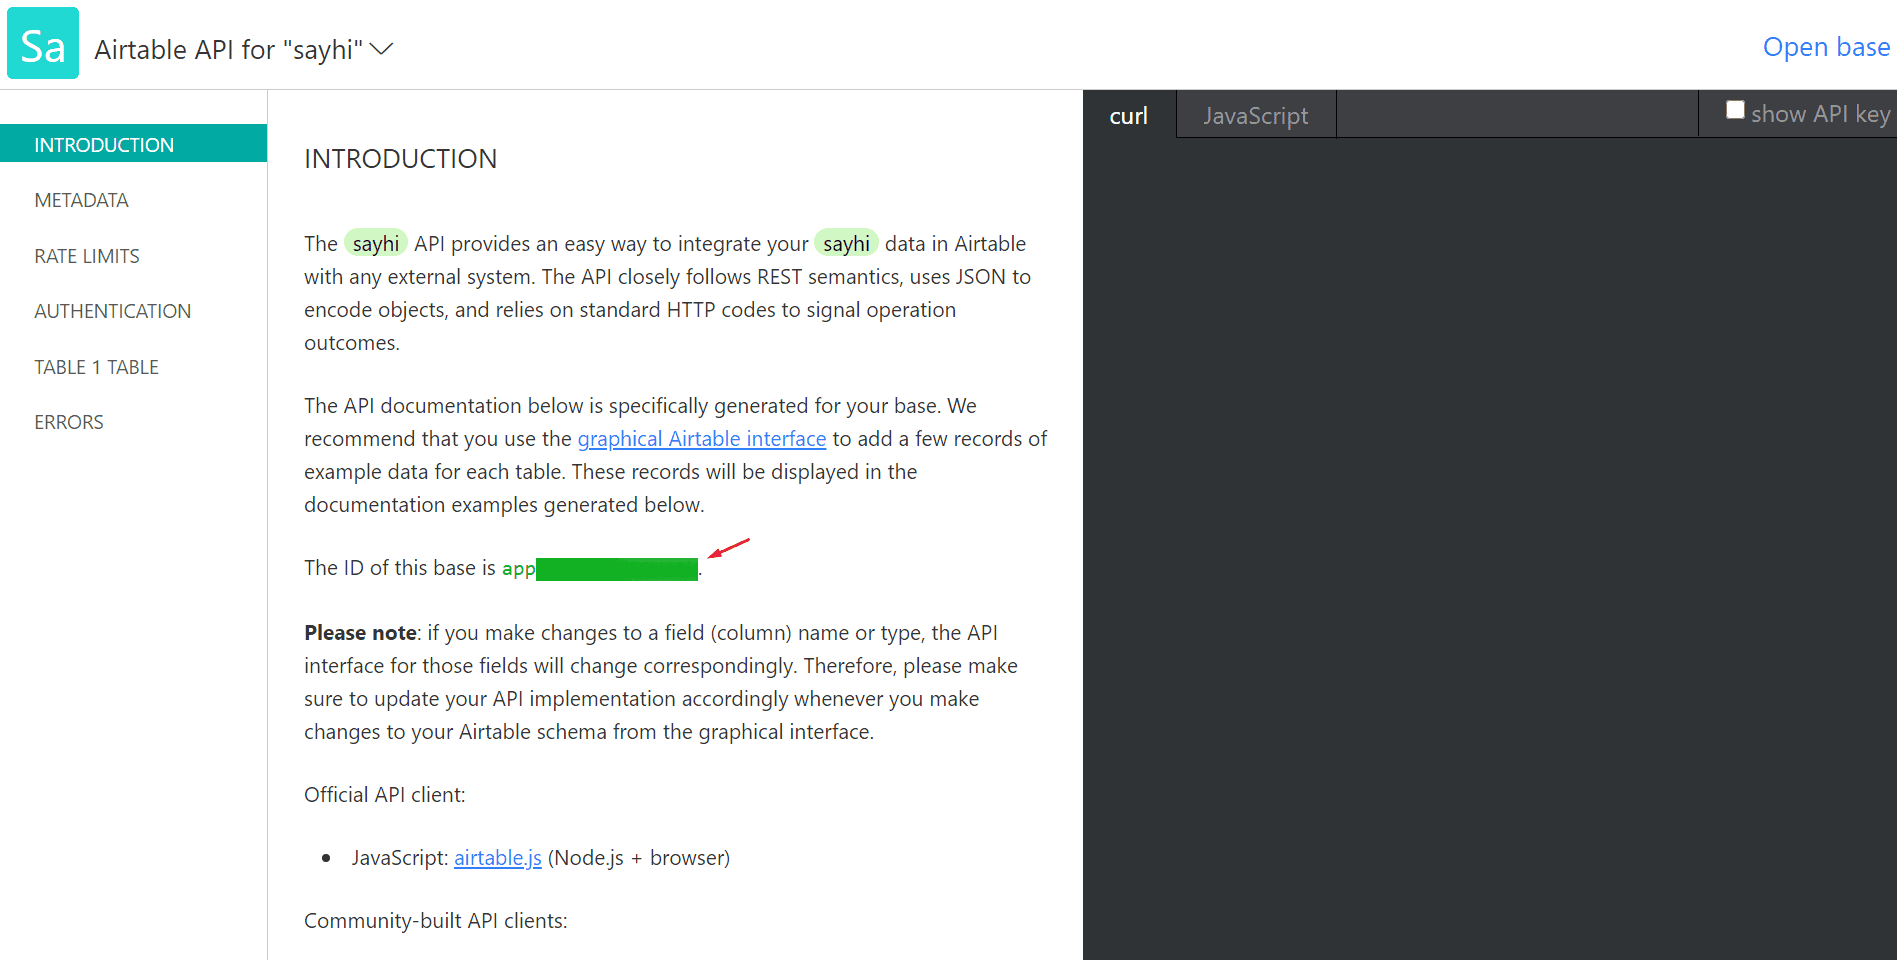
Create Airtable API Key and Base ID
Navigate to your account overview to create Airtable API key. You can also read through the Airtable API documentation for more details. We can get our base ID inside the documentation.
Install official Airtable JavaScript library
We need to install airtable.js as our npm package dependency by:
$ npm i airtable@latestCreate POST methods for our sayhi API endpoint
First, we need to initialize the Airtable base connection configurations. Then, we configure the table name. In this case, I am storing Airtable's API key, base id and table name in environment variables. We will only allow POST method in this example. name, email, subject and message will be in request body.
The following is the code for our sayhi.js functions and you can edit it according to your need:
const Airtable = require("airtable")
const handler = async (event) => {
// Configure Airtable base connection
const base = new Airtable({ apiKey: process.env.AIRTABLE_API_KEY }).base(
process.env.AIRTABLE_BASE_ID
)
// Configure table name
const table = base(process.env.AIRTABLE_TABLE_NAME)
try {
const { httpMethod } = event
let body = bodyParse(event.body)
const { name, email, subject, message } = body
const date = new Date()
// Only allow POST
if (httpMethod !== "POST") {
return {
statusCode: 405,
body: JSON.stringify({ message: "Method Not Allowed" })
}
} else if (!name || !email || !subject || !message) {
return {
statusCode: 400,
body: JSON.stringify({ message: "Bad Request" })
}
}
// Create record
// NOTE: Without `await`, this will not wait until data has been inserted into Airtable and return Status 202 due to async behaviour.
// As a result, we will receive 202 response code but our data are not inserted into our Airtable base.
await table
.create({
timestamp: date.toISOString(),
name,
email,
subject,
message
})
.then((rec) => {
console.log("Successfully inserted into airtable")
})
.catch((err) => {
throw err
})
return {
statusCode: 202,
body: JSON.stringify({ message: "Accepted" })
}
} catch (error) {
return { statusCode: 500, body: "Oops! Something went wrong." }
}
}
const bodyParse = (body = {}) => {
try {
let b = JSON.parse(body)
return b
} catch {
return {}
}
}
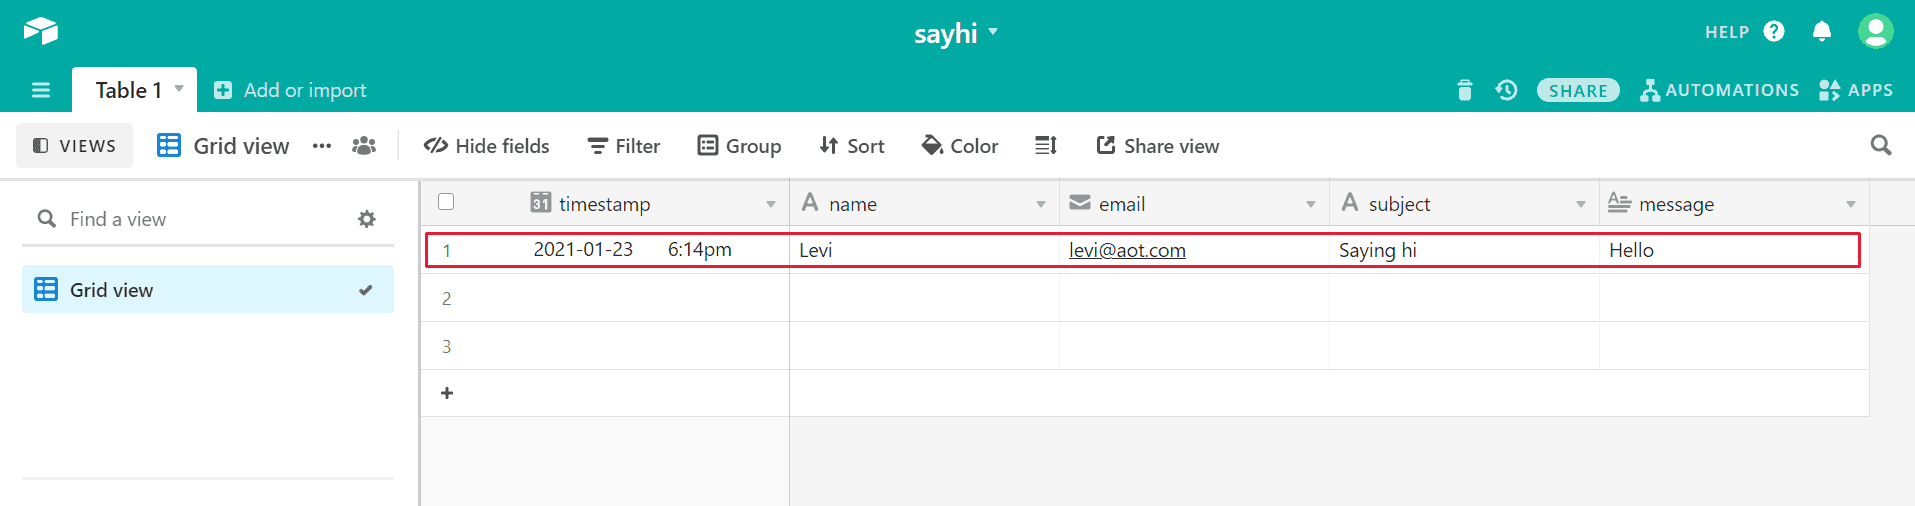
module.exports = { handler }I use Postman to verify the code works and return correct response code to the client. Make sure ntl dev is running while testing via Postman. The data from the request body will save into Airtable database.
Conclusions
We have implemented our sayhi serverless function. If you are building different kind of forms, you can also explore Netlify Forms as an alternative. It will be more simple approach. You get the idea.
Hope you learn something new today.

